Anechoic SAL Week Two: Beginner FPP, Block 5
Introduction to FPP
FPP can be a little intimidating at first, but just take it slow. The paper is really only meant to be a guide.
Sewing machine settings
- Use a stitch length of 1.5 - 1.8. This will help perforate the paper for easier removal later on.
- Always back stitch at the beginning and end of each seam. This will prevent your stitches from getting ripped out when removing the paper. Once papers have been removed, you can stop doing this.
Template Anatomy

Sewing an FPP Template
Preamble
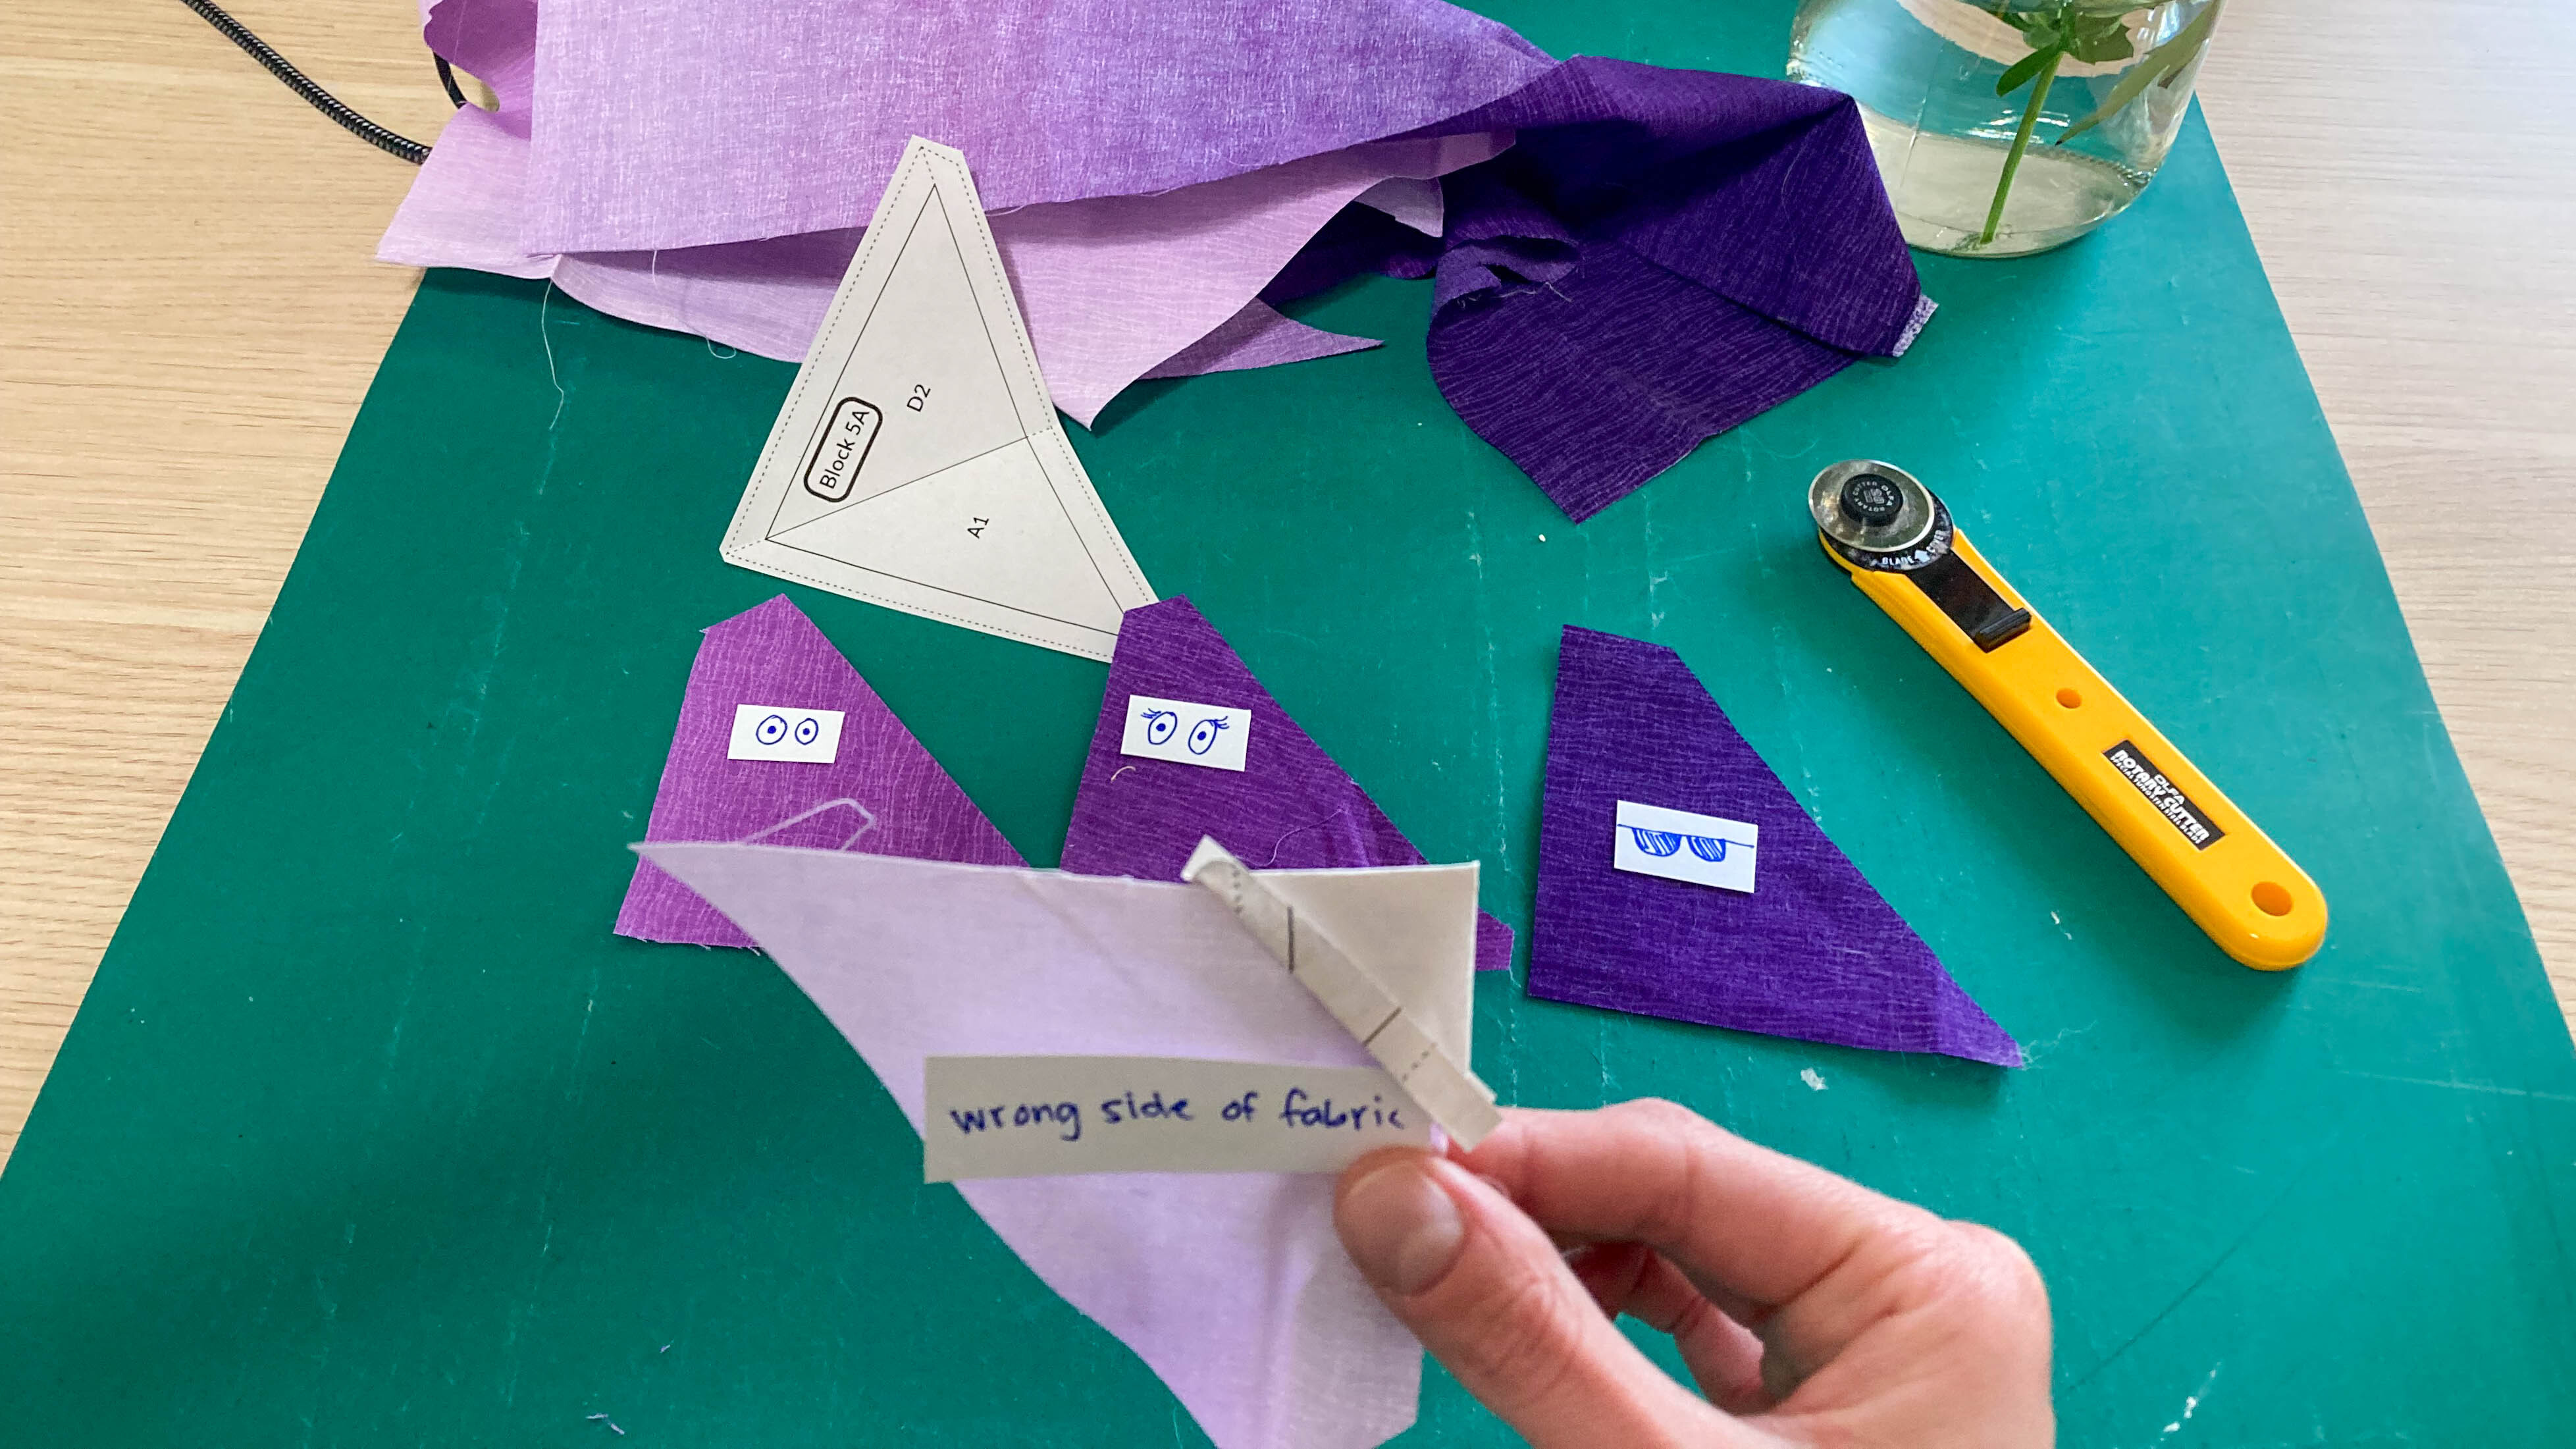
The part that always trips me up when starting an FPP project is remembering which side of the fabric faces where.
Thinking of these two things has helped me a lot:
One: Fabric is always sewn right sides together. It's so basic, but yet easy to forget.
Two: Ok - I'm a little pre-embarrassed for this one, but I started visualizing this ridiculous scene to remember that the first fabric is always wrong side facing down:
Narrator [read in a dramatic tone]: Your first fabric is the fearless leader of the Template - she is Number One! She's going to stand up and face the other fabrics, and give them a pep talk about how awesome template life is going to be. But starch is nowhere to be seen, and so our fearless hero needs some help staying upright.
[enter quilter to the scene]
Quilter [that's you!]: I help support our Fabric #1 and don't mind that her back is to me while she delivers her inspiring address. Number One takes a bow, but wait! She trips and falls right sides together onto her second-in-command - Fabric #2.
[cut scene]
Moral of the story: The first fabric of a template is the one and only fabric that faces down.
(I'm going to go hide now, and yes, that is a little paper hat on our fearless hero)
Video Instructions
Photo & Text Instructions
Step One
(If not done already, fold template along the seam line separating Fabrics A and D. Covered here.
- Place Fabric A on your table so that its right side is facing down. Beside it, place Fabric D with its right side facing up.
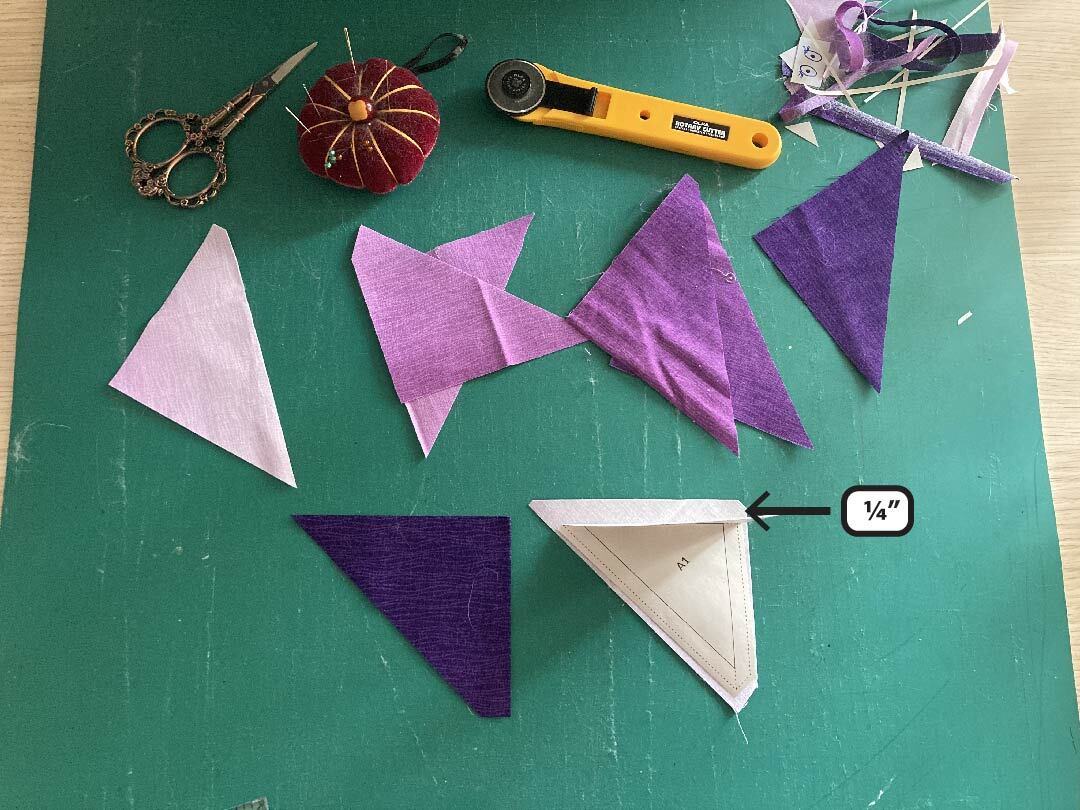
- Place the A1 section of Template Block 5A on top of Fabric A so that the entire A1 section is covering Fabric A. The fold line of the template should be a 1/4" away from the fabric edge - this is your seam allowance.
Step Two
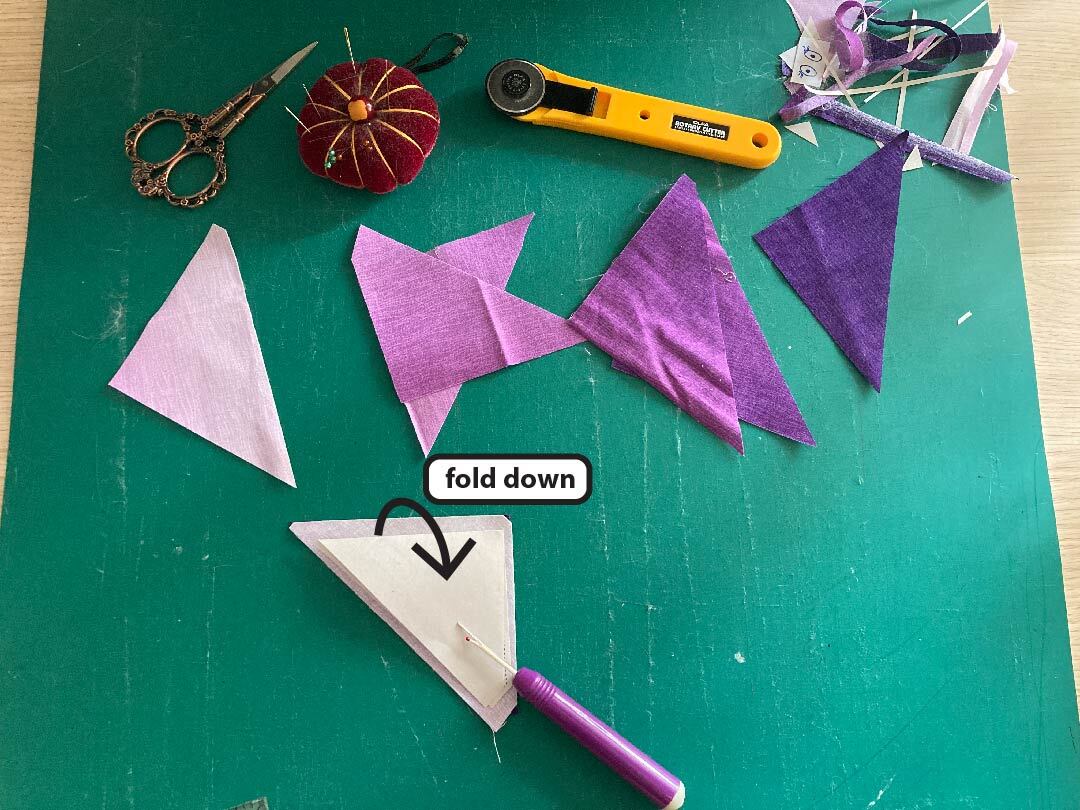
- Carefully pick up both Fabric A and the template, and place on top of Fabric D, aligning the seam allowance edge of Fabric A with the fabric edge of Fabric D.
- Fold the template down on itself. Fabric D should be entirely covered by the folded over D2 section of the template. Adjust the template or Fabric D as needed. Double check that the A1 section is still covering Fabric A.
- Double check that your template placement still leaves 1/4" seam allowance.
Step Three
[optional - pin template and fabric together. This is personal preference.]
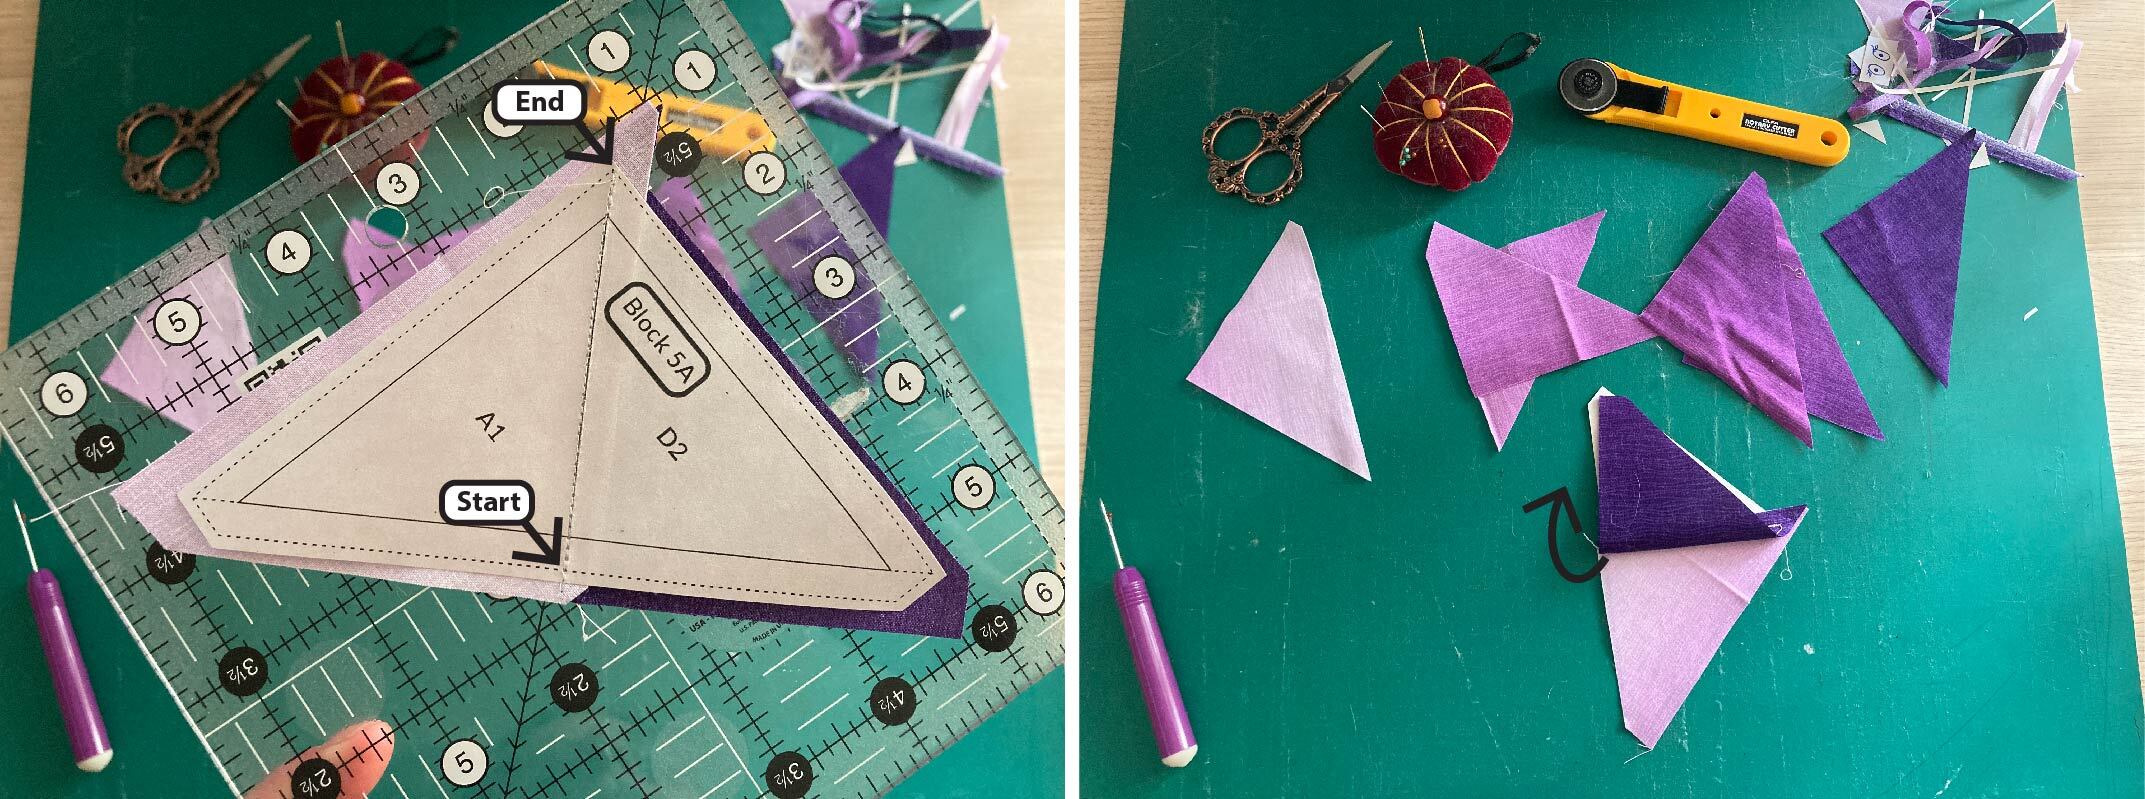
- Open the template back up and carefully move your fabrics and template to your sewing machine. Check that everything is still aligned.
- Sew your seam, back stitching at the front and end of your seam.
- [optional - trim seam allowance to 1/4" if too big.]
Step Four
Fold back Fabric D and press. There should be fabric surrounding all the edges of your template. If there isn't, you may need to redo the seam.
QUIZ: If the template was instead written as D1 and A2 - would you get the same Block 5 end result?? Answer below.
Step Five
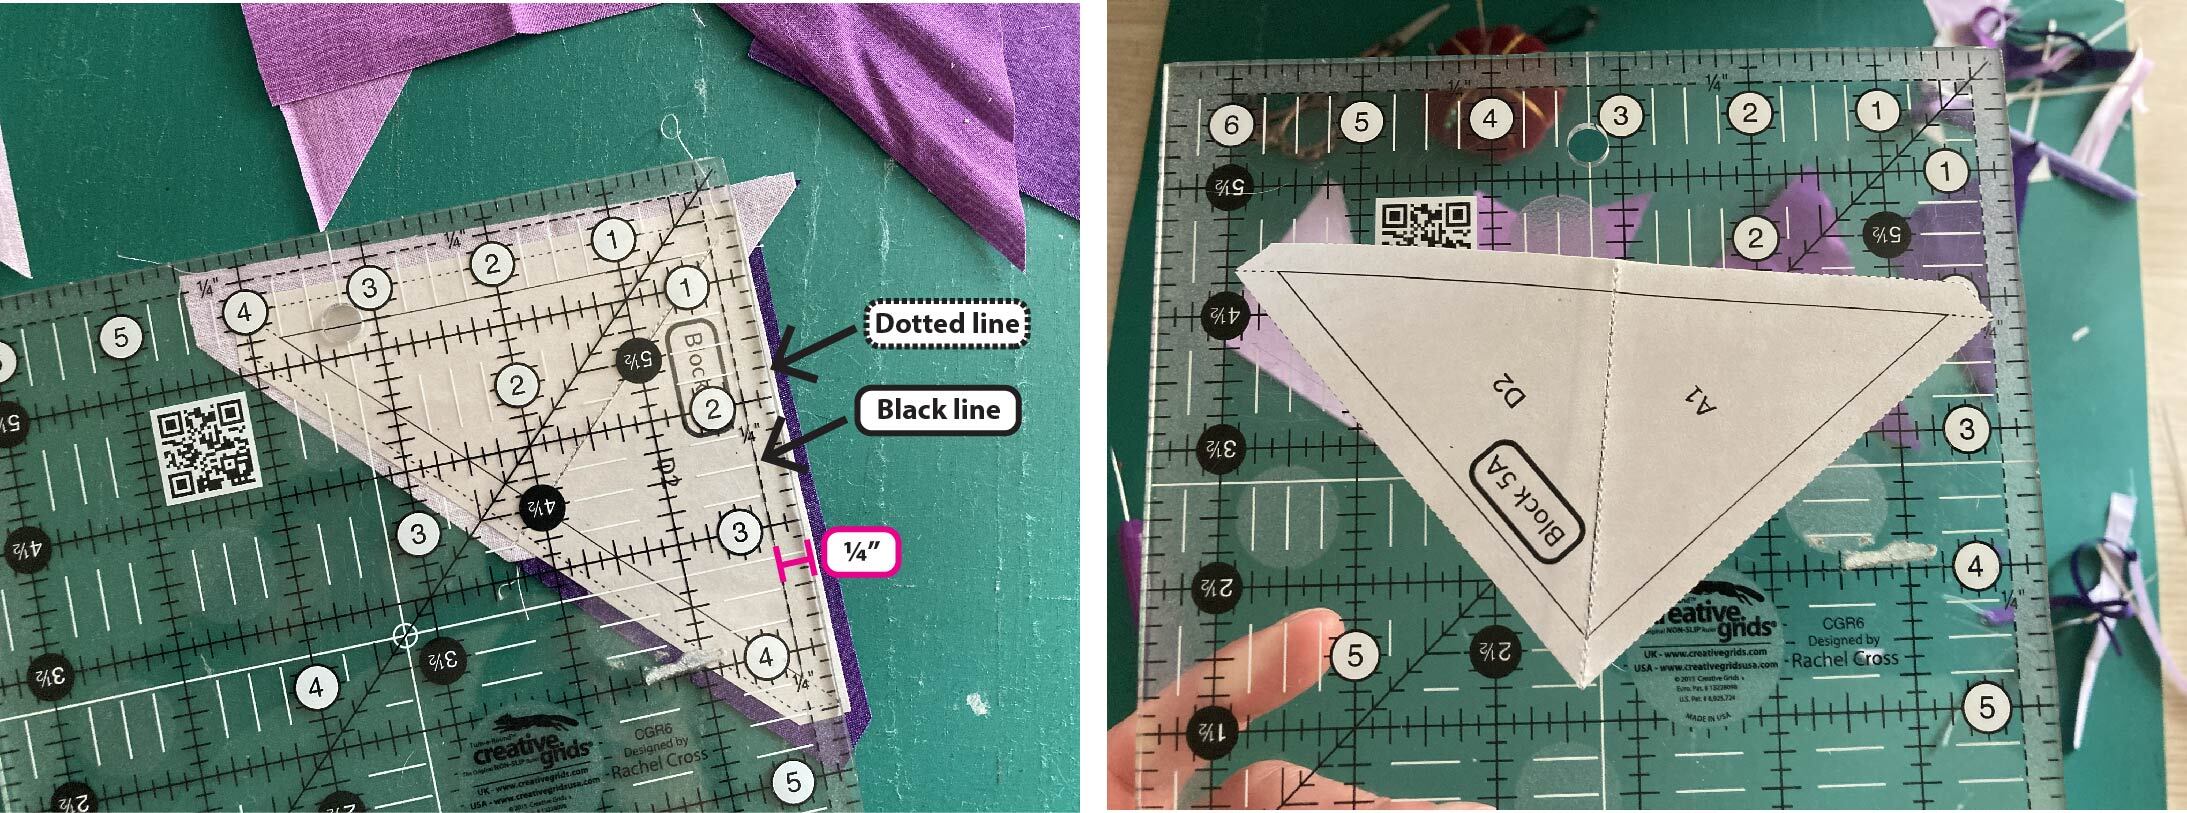
Trim template to remove excess fabric and paper. I recommend using the solid black line on the template as a reference for trimming. Leave 1/4" all around.
Step Six
Repeat with Template Block 5B.
Step Seven
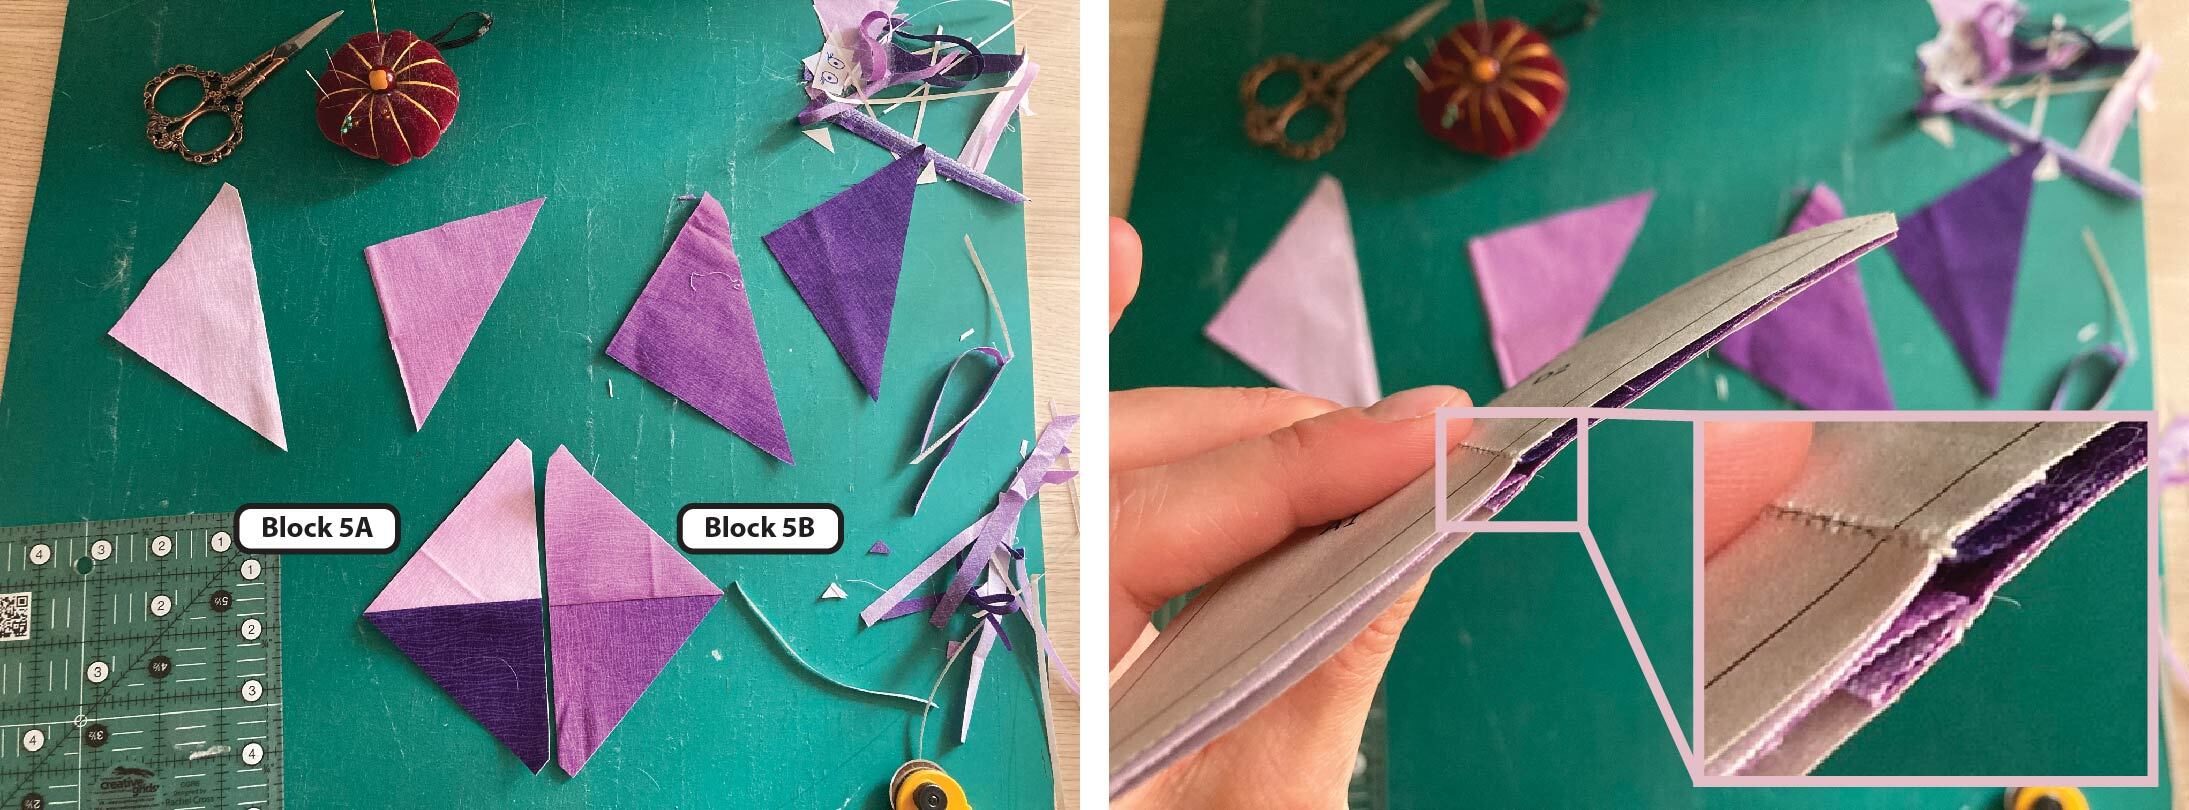
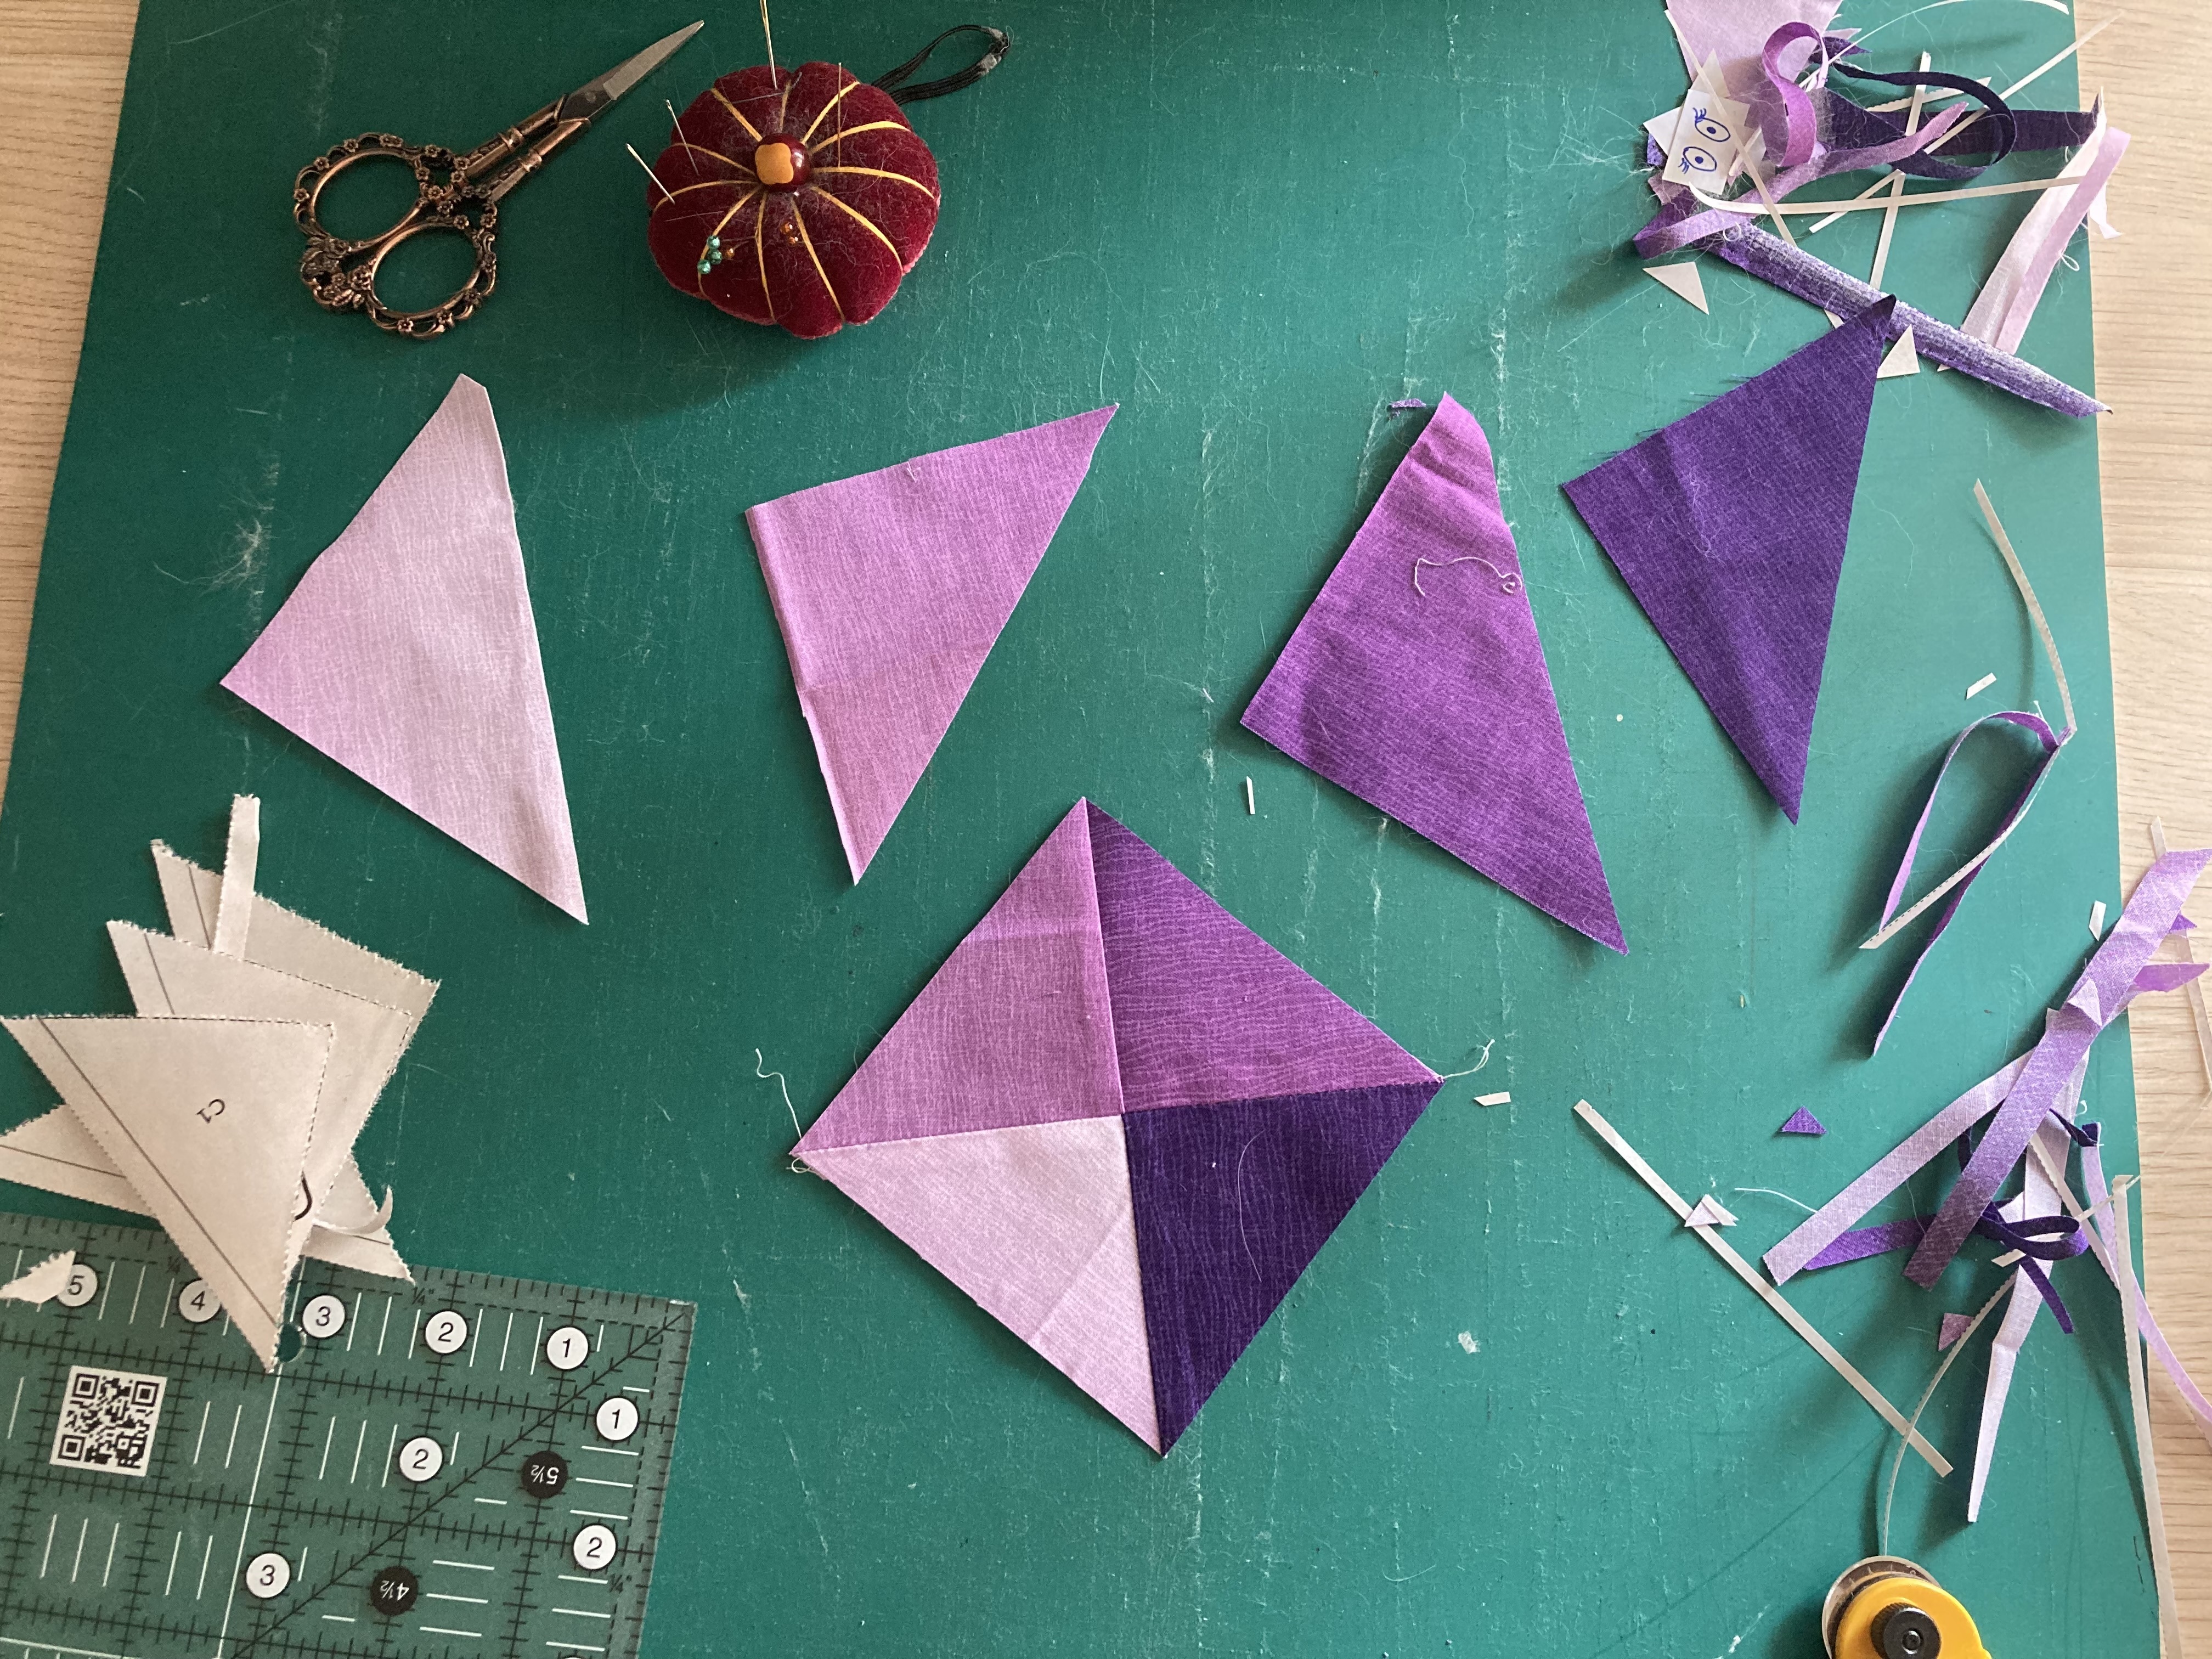
Sew Templates Block 5A and Block 5B together, nesting seams together. Use pins if needed.
For those of you who haven't nested seams before - to nest seams simply means to align the seams so they slot together. Because each seam is pressed to the side (not open), the seam will be slightly raised. When you put Block 5A and Block 5B right sides together, those seams should almost lock together where the raised edge of one template fits into the lower side of the opposite template. If you keep them flush together, you're going to get a perfect intersection of those fabrics.
Step Eight
Remove papers. Be gentle. Sometimes folding them back and forth a couple times to weaken the paper can help.
Step Nine
Press seam open. Admire your fearless hero hanging out with her fabric friends. Only 160 more speeches to go!
Moving to chain piecing FPP
Once you get comfortable with the process, you can start to chain piece the templates (if that's your jam). I kind of like pressing play on my audiobook and just doing it template by template. Whatever works for you! Plus - that gets me once step closer to ticking off that audiobook box on our SAL bingo sheet.
Quiz answer: No! The fabric order determines which way the seam is pressed. As written, Fabric D is pressed away from Fabric A. If we were to start with Fabric D instead, Fabric A would be pressed away from Fabric D. So what's the big deal? FPP patterns are (hopefully) written with seams in mind to reduce bulk. By starting with Fabric D in Template 5A, Template 5A will no longer be able to nest with Template 5B. It's not a deal breaker, but there really is something satisfying about nested seams.
Note: If you're doing other FPP projects with templates with 3 or more fabrics, there are a few little tweaks to the process.