Anechoic SAL Summary
For those of you who weren't able to join the Anechoic SAL, here are some of the tips and resources found in the newsletters. I hope you find them helpful!
Week One
Supporting blog posts:
Blog: Understanding Colour Value
Blog: Beginner FPPers, Intro to FPP (with video tutorial)
Week Two
Supporting blog post:
Blog: Beginner FPP, Block 5 (with video tutorial)
Cutting Tips
This week we're cutting all our fabric. I usually cut as I go, but I pre-cut everything for the pink quadrant of my quilt, and loved just having it out of the way.
There are a couple of ways that we can speed up the cutting process by cutting multiple template pieces at the same time. If you're not comfortable doing this, just follow the suggested cutting instructions as written. Or if you're making more than one quadrant, maybe try it with your second quadrant.
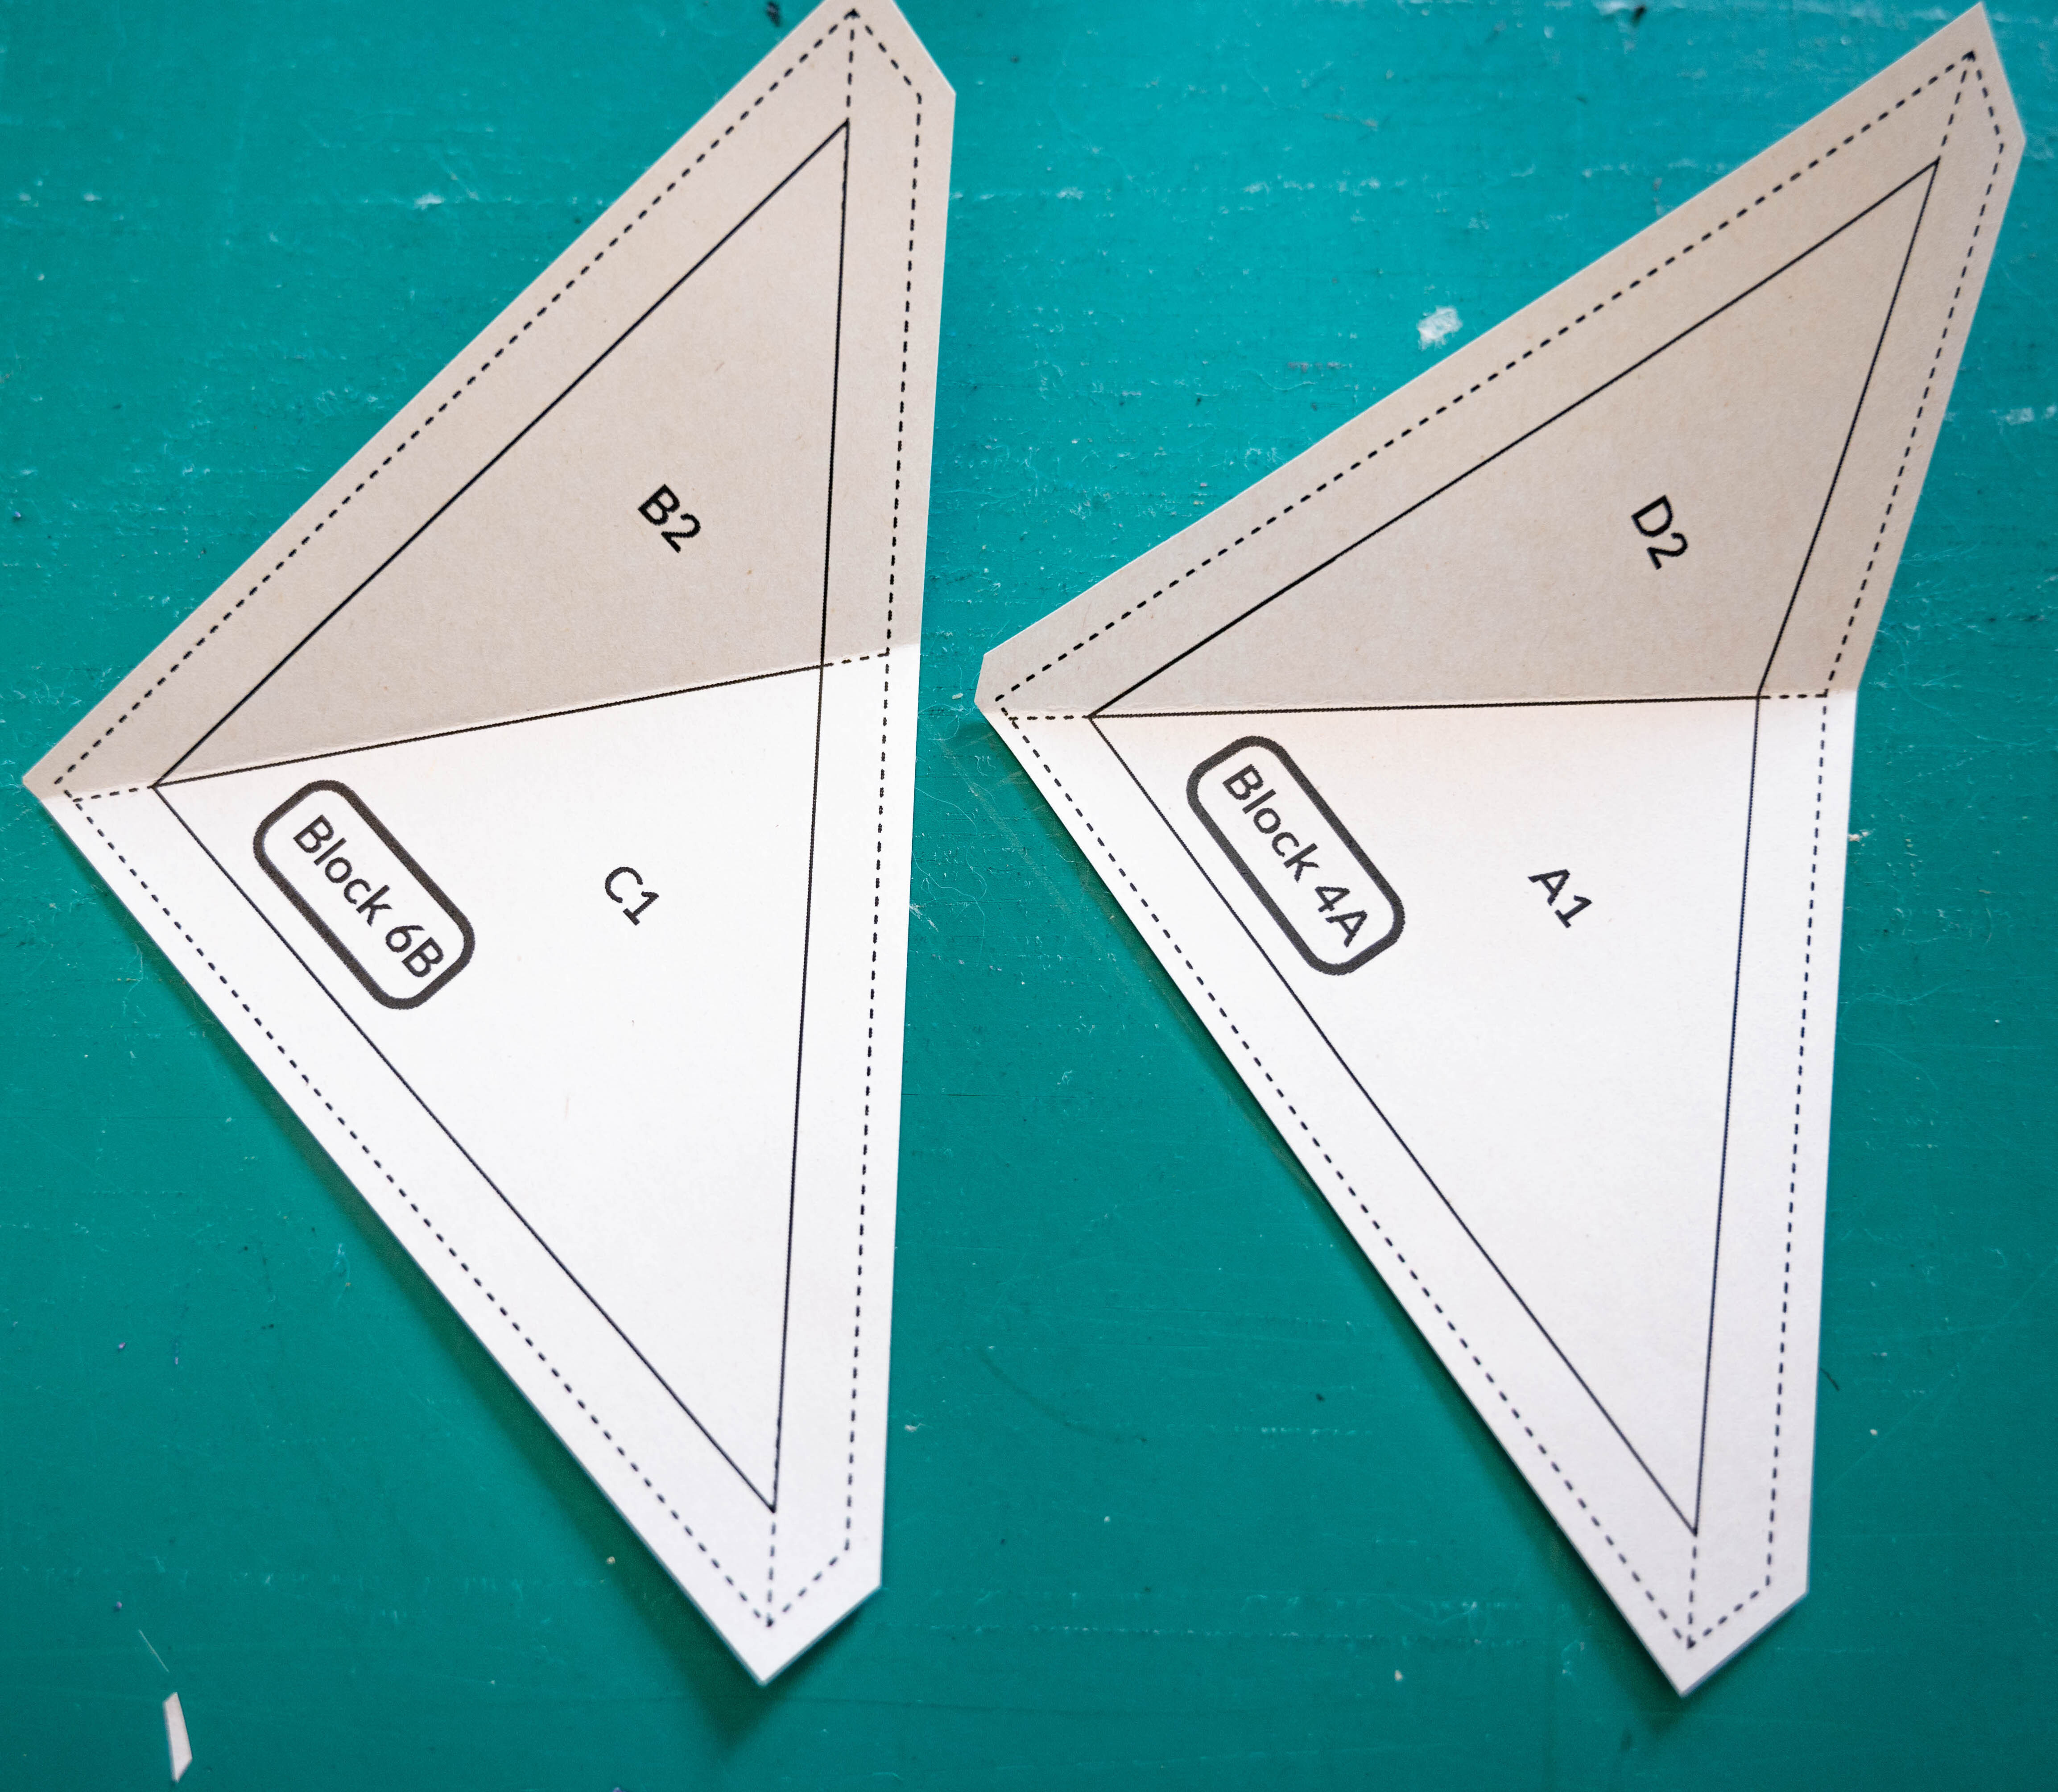
Grab templates Block 6B and Block 4A. What do you notice about them?
Block 6B C1 and Block 4A A1 are related! They are the same shape and have the same number. Similarly, B2 and D2 are related. That means you can layer the pieces of fabric for Block 6B C1 and Block 4A A1 on top of each other and cut both at the same time! Just make sure that both are wrong side facing up.
Ready to make it more complicated?
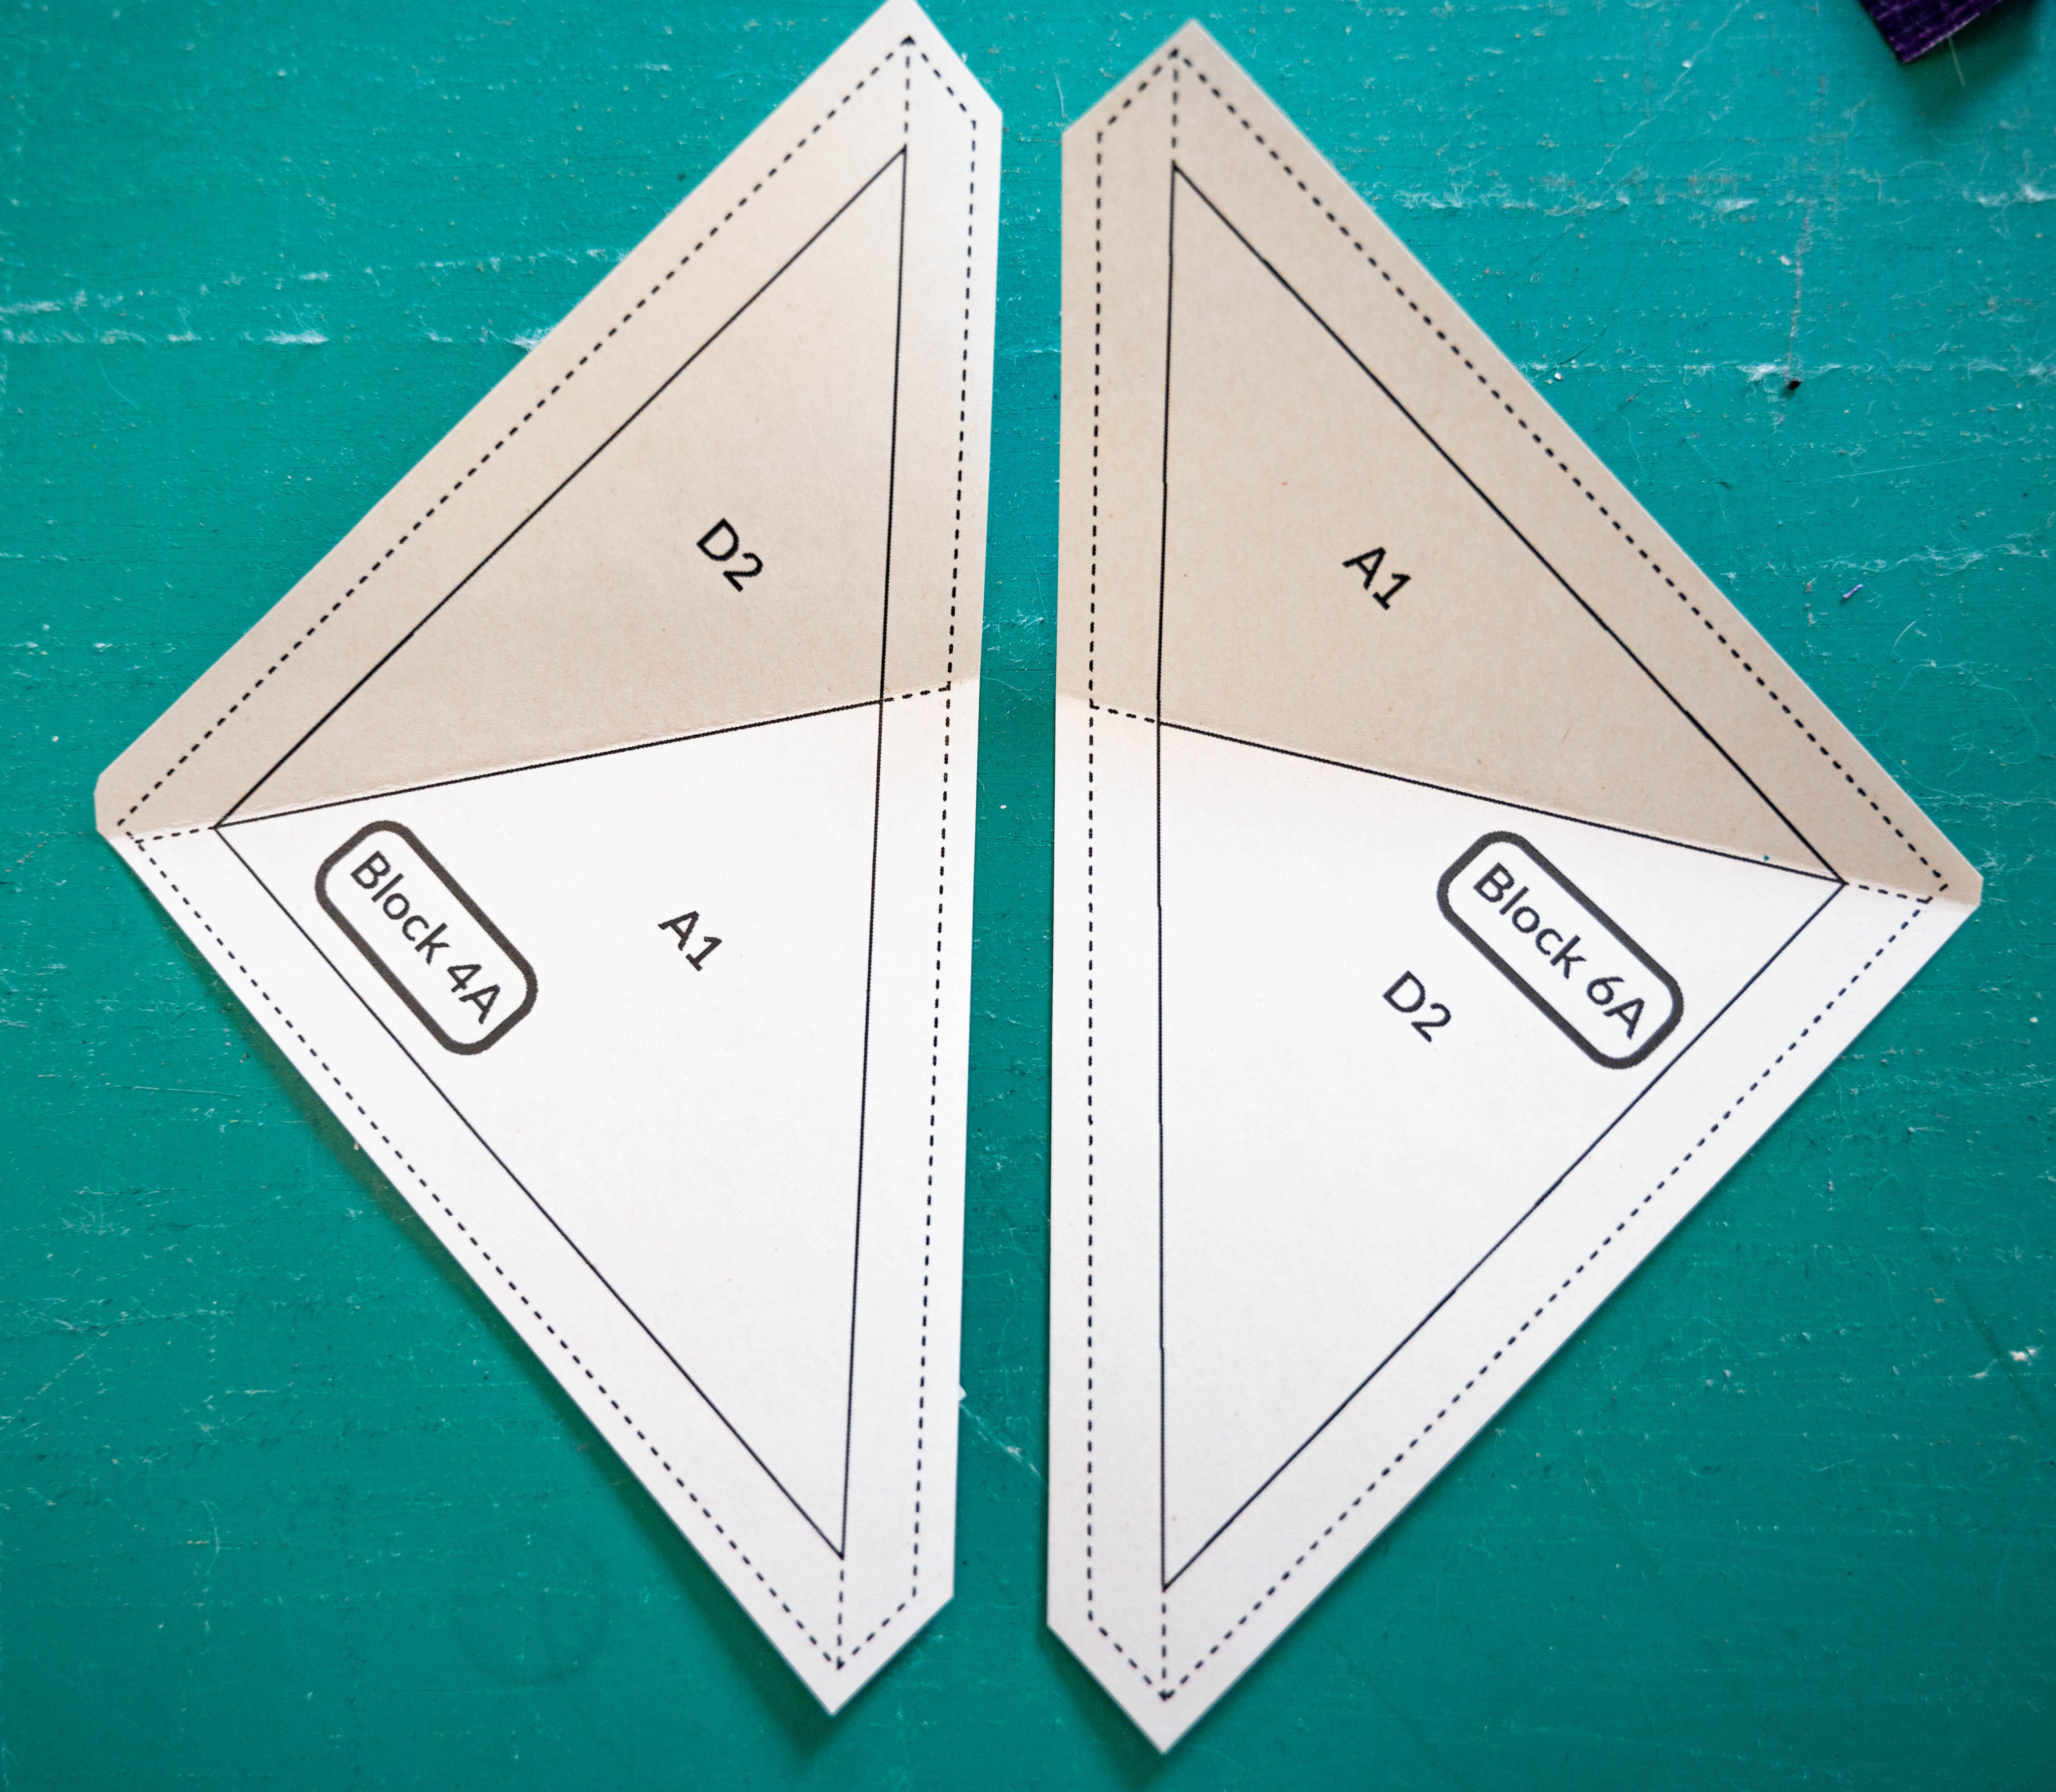
Grab templates Block 4A and Block 6A. How are these templates related? The templates are mirror images of each other, but the fabric order is different. The Block 4A A1 template can be used to cut the fabric for Block 6A D2, but Fabric D needs to have its wrong side facing down. This requires a little more mental gymnastics, so choose whatever method works for how you're feeling.
Solids user? Cool - you don't have to deal with fabric sides!
(Technically both Kona and AGF PURE solids have sides, but the same fabric is never directly beside itself, so I don't find that it matters for this quilt.)
These are the related Block pairs:
Block 2 and Block 8, Block 3 and Block 7, Block 4 and Block 6, and Block 5 to itself.
Week 3
Supporting blog post:
Prep in Advance
The assembly part of quilting isn't my favourite part of the process, and so one thing I like doing to break it up is to start assembling as I go. If you have some extra sewing time during the week, consider sewing your blocks together into their respective columns.
Week 4
HSTs
Before trimming your HSTs, check how big your other blocks are. They should all be 4" squares, but theoretical versus reality are often very different things. Most of my blocks came in just a smidge under 4" and so when I was assembling my rows, I had trouble lining up the HST rows with the rest of the rows. If your blocks are 4" squares - great! If they're not, consider trimming your HSTs a smidge smaller than 4".
Assembly
I know assembly isn't until next week, but I just wanted to make this comment in case anyone is working ahead. In the pattern, I suggest pressing your seams to the side so that they can be nested. This worked really well for me, but honestly, it's a huge pain 🤪
For this version, I pressed all my seams open when assembling and it worked out okay! It just meant that I actually had to pin my rows together instead of free style it like I do when nesting seams.
Week 5
Finishing your quilt
Facing is an easy way to finish off a quilt so that the binding is invisible. I followed Cotton & Bourbon's free downloadable tutorial and really loved the end result.